This post was most recently updated on July 31st, 2024
Hello everyone, in the previous article we saw Modern SharePoint and Modern SharePoint vs Classic SharePoint in SharePoint Online now in this article, we will discuss the following points:
- Overview of SharePoint Framework (SPFx)
- Set up configuration Office 365 tenant app catalog site
- Set up configuration SharePoint Framework development environment
- Steps to build SharePoint client-side web part
- Web part project structure
SharePoint Framework (SPFx)
The SharePoint Framework (SPFx) is a web part model provides full support for client-side SharePoint development, easy integration with SharePoint data, and support for open source tooling. Microsoft releases SPFx in the year 2016 for SharePoint online only later soon also for on-premises.
List of the key feature of SPFx are:
- SPFx runs in the context of current user and connection in a browser in both locally and online workbench environment. In SPFx there is no iFrames structure for customization mean javascript are directly embedded on the page.
- End-user use SPFx web part solution on behalf of tenant administrator approvers for all sites or on personal sites.
- SPFx web parts can be added and worked well on both classic and modern pages.
- All SPFx web parts controls are responsive by nature.
- SPFx is based on common open source client development tools such as npm, TypeScript, Yeoman, web pack, and gulp.
- All SPFx web parts are rendered on normal pages without iframe tags
- SPFx data model support REST services and JavaScript Object Model (JSOM)
Set up configuration Office 365 tenant app catalog site
For SharePoint Framework (SPFx) to build and deploy client-side web part you need Office 365 tenant admin permission to create an app catalog site. The App Catalog site is a special site collection, its scoped to an all over web application, all apps that you want to make available for a web application have to be in the App Catalog site collection so that app is available for all web application.
When you create an App Catalog site, you get two libraries for apps:
- Apps for SharePoint
- Apps for Office
Steps to create an app catalog site
- Go to the SharePoint Admin Center by entering the following URL in your browser. Replace yourtenantprefix with your Office 365 tenant prefix.
1https://yourtenantprefix-admin.sharepoint.com
- In the left sidebar, select the apps menu item, and then select an app catalog.
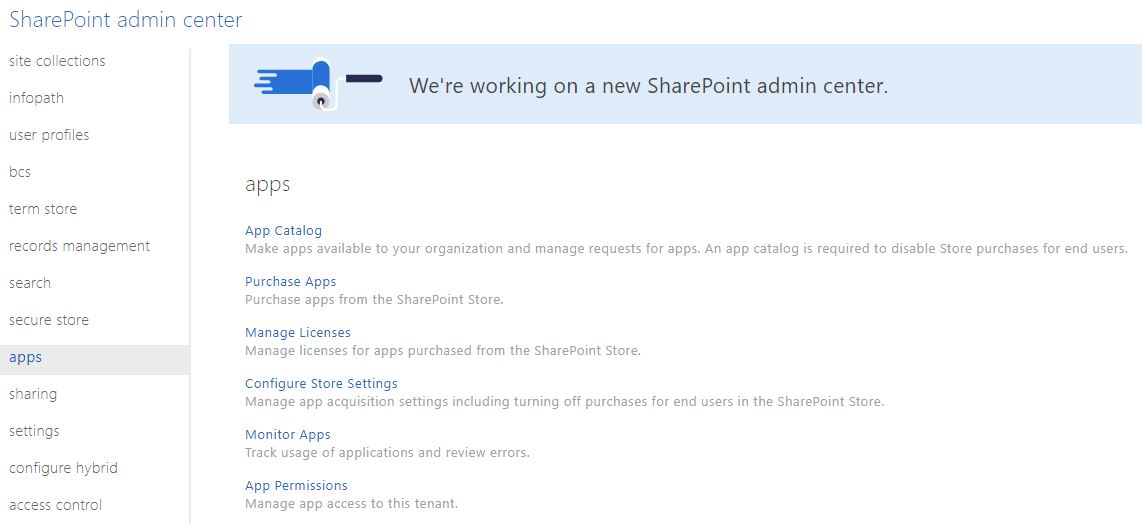
- If the App Catalog site doesn’t open, select Create a new app catalog site and then select OK.

- On the Create App Catalog Site Collection page, enter the required information.
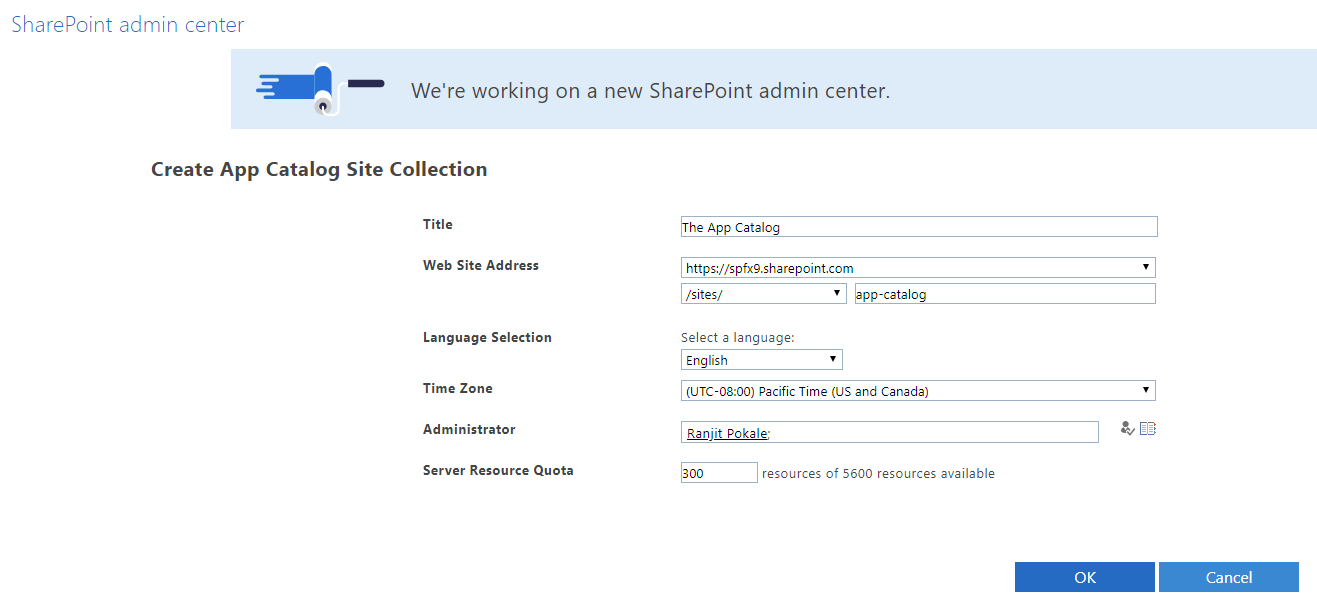
- Title: Enter The App Catalog.
- Web Site Address suffix: Enter your preferred suffix for the app catalog; for example app-catalog
- Administrator: Enter your username, and then select the resolve button to resolve the username.
- Select OK to create an app catalog site.

Note: You can have only one App Catalog site collection per SharePoint Online tenant, and only tenant admin has to create it once.
Set up a configuration for SharePoint Framework development environment
In this second step, we have to configure SPFx development environment means we need to install a developer tools
-
- Install NodeJS LTS version
- For Windows machine, we use MSI installer to installer to setup NodeJs
- For Mac machine, we use homebrew to install and manage NodeJS.
Note: Use node -v command on CMD to check you have already NodeJs installed or not if yes then it will return the current version of Node Js.
- For development, we need to install IDE Visual Studio Code
- Install Yeoman and gulp- A Yeoman generator for creating new web parts. The generator provides common build tools, and a common structure to the website to host web parts for testing.
1npm install -g yo gulp
- Install Yeoman SharePoint generator- The Yeoman SharePoint web part generator helps you quickly create a SharePoint client-side solution project with the right toolchain and project structure.
1npm install -g @microsoft/generator-sharepoint
For more info on Yeoman command click here.
- Install NodeJS LTS version
Steps to build SharePoint client-side web part
To build a SharePoint client-side web part we use windows command prompt shell
-
-
- Open Command Prompt CMD. By default, CMD set default user location C:\Users\ _PCName_

- Create a new project directory by md command.
1md helloworld-webpart - Now go to the project directory by cd command.
1cd helloworld-webpart - Now run Yeoman SharePoint Generator
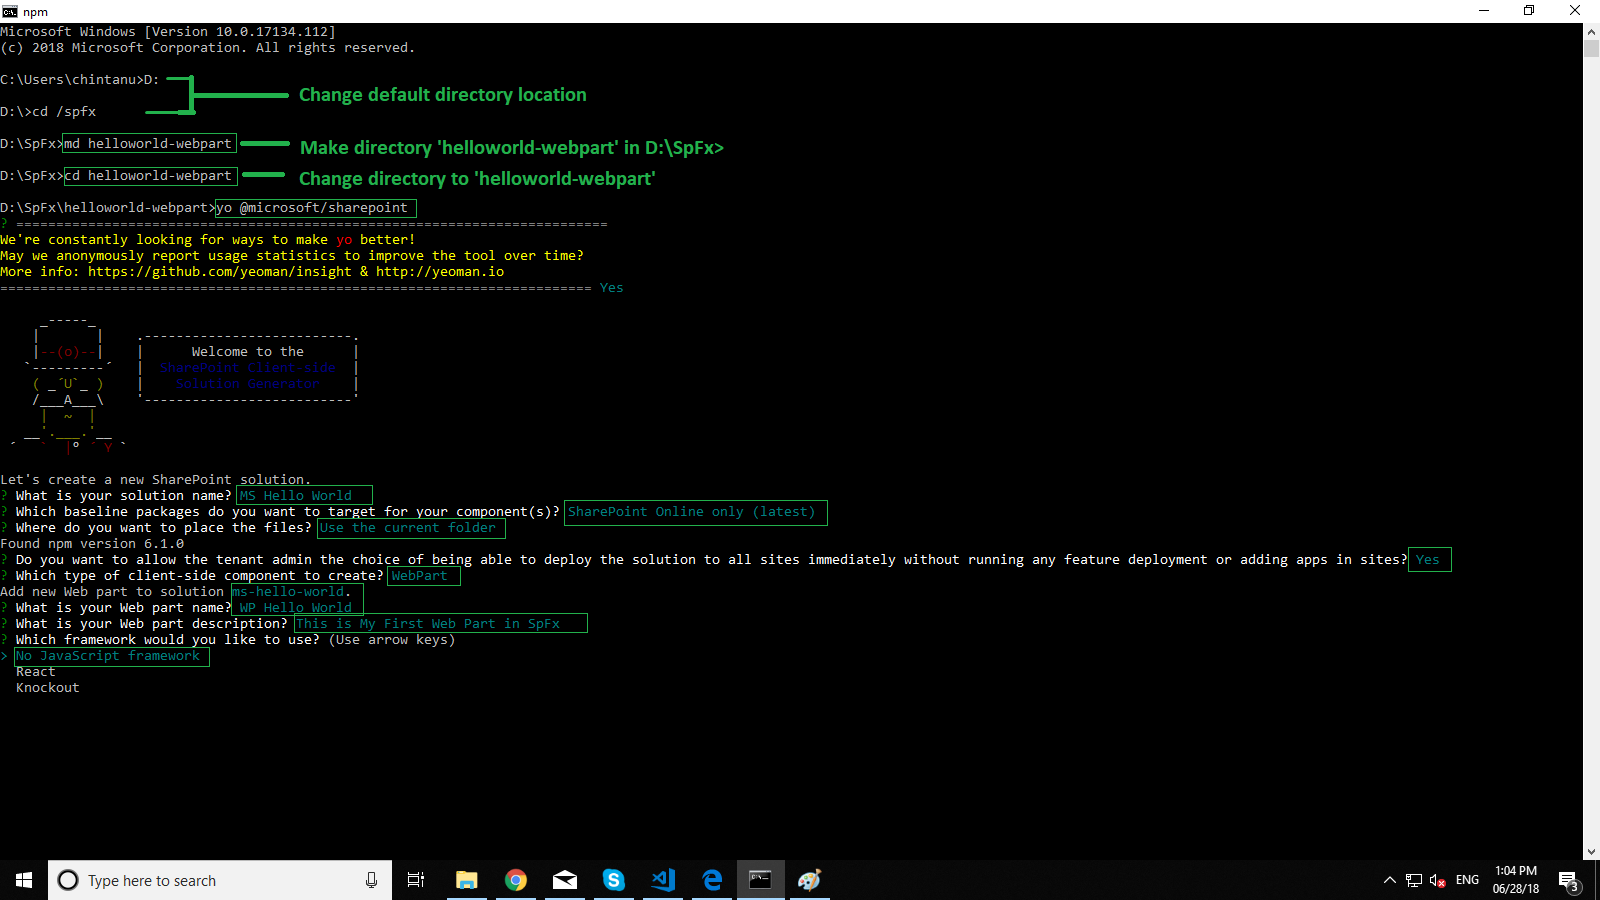
1yo @microsoft/sharepoint - Now prompt ask set of configuration about web part.
-
- Solution name? – MS Hello World
- Baseline Package Component(s)? – SharePoint Online only (latest)
- File location? – Use the current folder
- Tenant admin approval – Yes
- Type of client-side component – WebPart
- Web part name – WP Hello World
- Web part description – This is my first web part in SPFx
- Framework – No Javascript framework
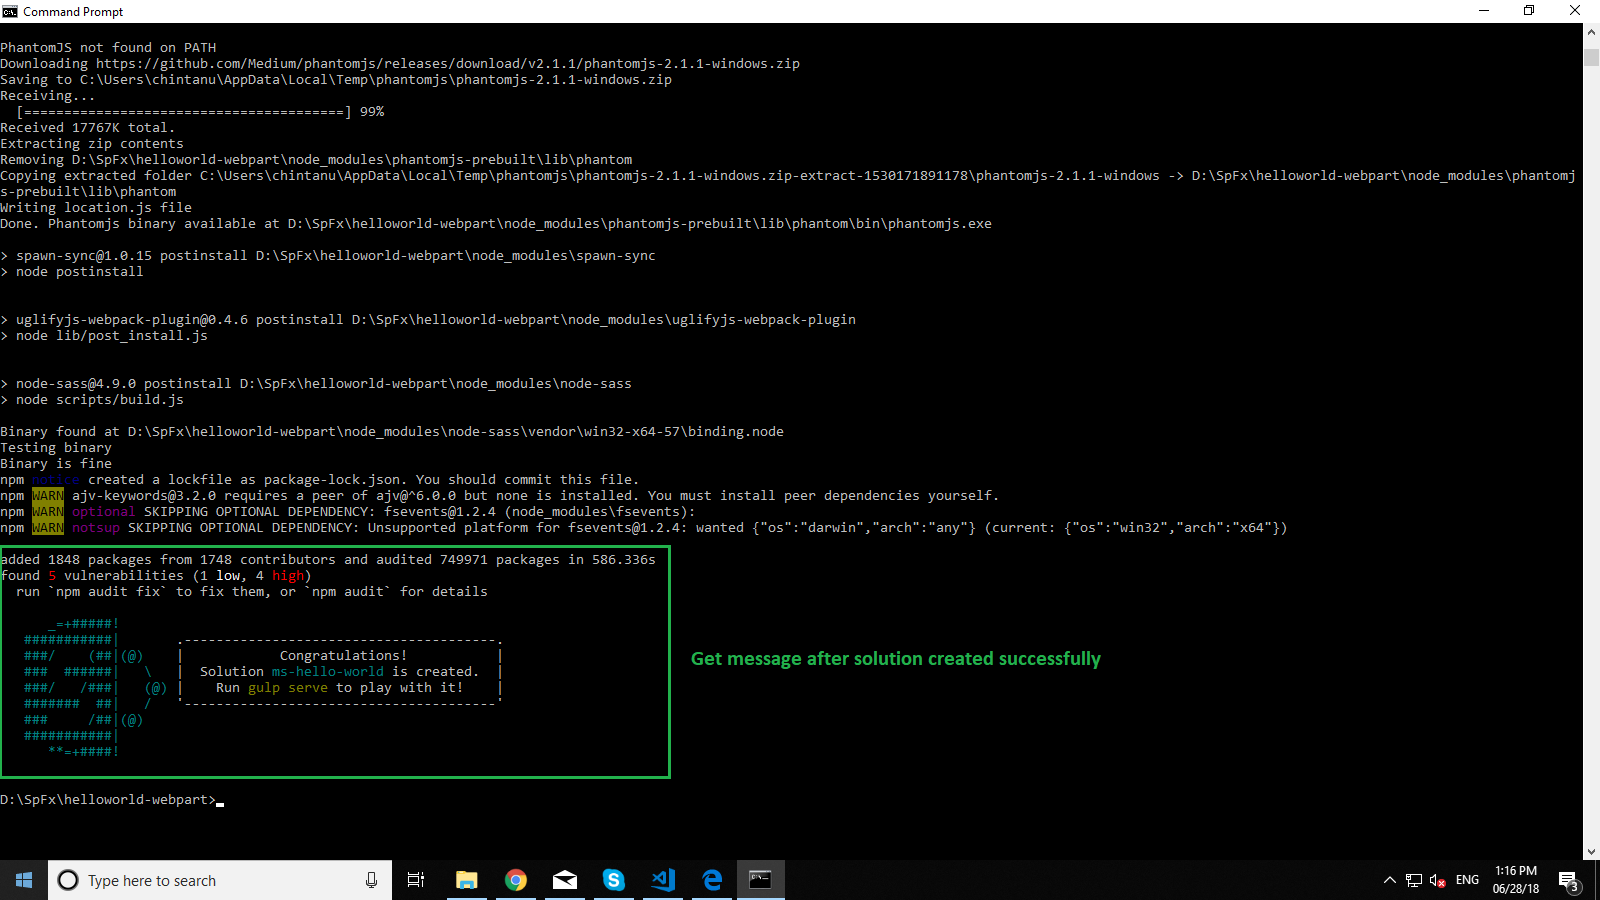
- At this point, Yeoman installs the required dependencies and scaffolds the solution files along with the HelloWorld web part. This might take a few minutes.
-
- Run or Preview the web part we use gulp serve command.
 This command use for build and run web part on a local browser- HTTPS server localhost:4321 and launches your default browser to preview web parts from your local dev environment. The address of workbench preview web part page is https://localhost:4321/temp/workbench.html
  We also use SharePoint Workbench to host and preview test of local web parts. The key advantage of SharePoint Workbench is it runs in the context of SharePoint so we able to interact with SharePoint elements like a list, library etc. For SharePoint Workbench hit following URL.
1https://your-sharepoint-tenant.sharepoint.com/_layouts/workbench.aspx
Now select + add an icon from canvas which shows a list of web parts in a site so you have to select WP Hello World.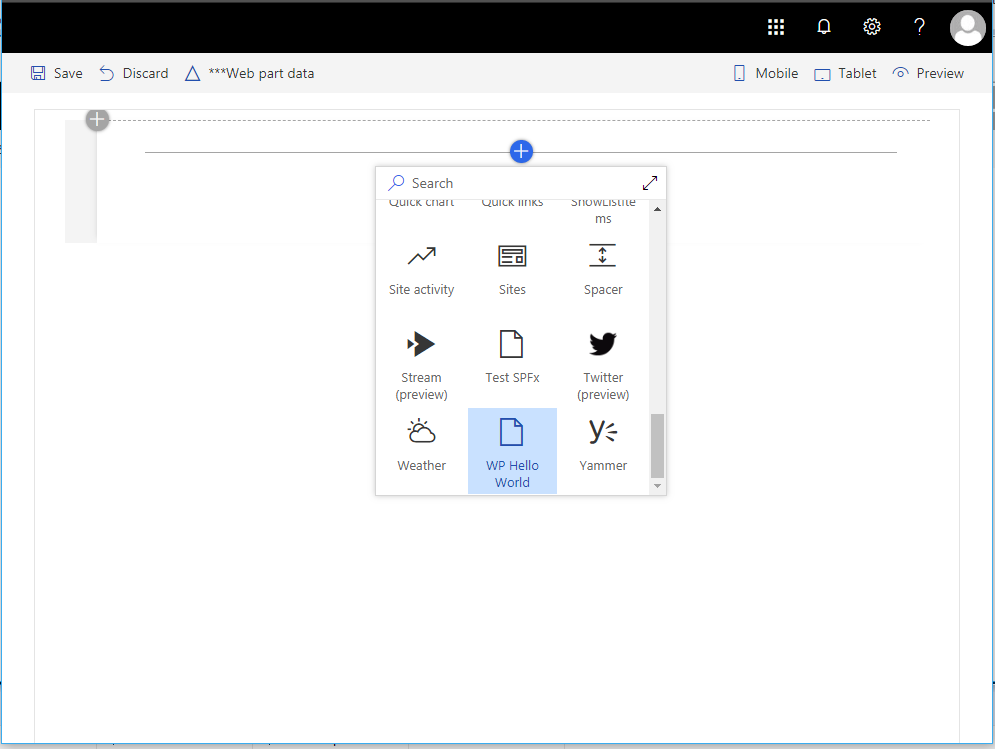
Add WP Hello World from the toolbox. Now you’re running your web part in a page hosted in SharePoint!

- If you want to stop Yeomen server you use Ctrl+C command followed by Y

- Open Command Prompt CMD. By default, CMD set default user location C:\Users\ _PCName_
-
Web part project structure
Here we discuss on web part project structure using Visual Code editor.
- Open Visual Code Editor. From the menu bar, select Files => Open Folder option to open helloworld-webpart
- Now Visual Code dashboard show helloworld-webpart project structure see screenshot below.
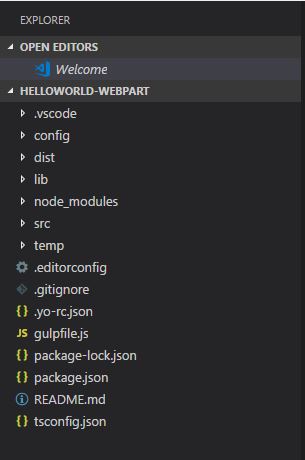
Project structure contains all basic and dependency files in respective folders like src, config, lib, and dest etc.
- src folder contains three main files .manifest.json, .module.scss, .ts

.manifest.json – This file tells SharePoint about important properties of client-side web part like title, description, icon, properties, version, group and requiresCustomScript flag etc.
.module.scss – SCSS is a special type of file for SASS, a program written in Ruby that assembles CSS style sheets for a browser. SASS adds lots of additional functionality to CSS like variables, nesting and more which can make writing CSS easier and faster. SCSS files are processed by the server running a web app to output a traditional CSS that your browser can understand.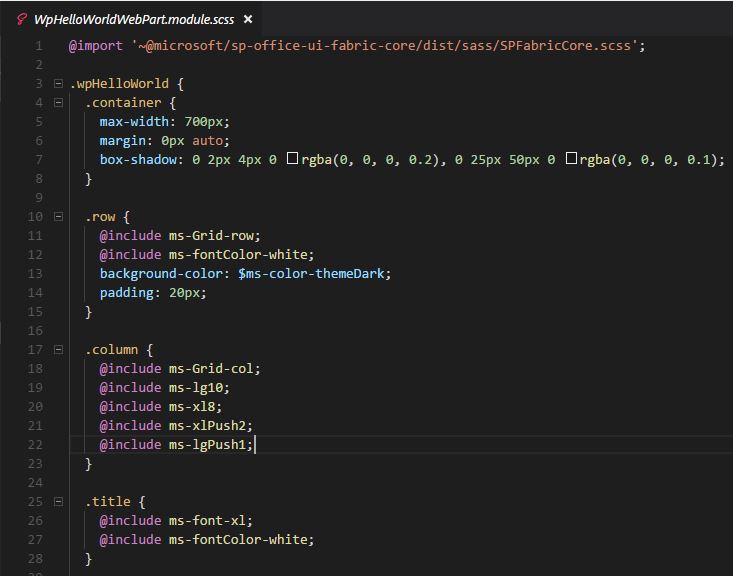
.ts – This typescript file is the main file in project solution where all files are source files are added like a .scss file, external js, images etc. This file has web part class; the main entry point for the web part. Here we also set web part properties, customize and render web part HTML etc.
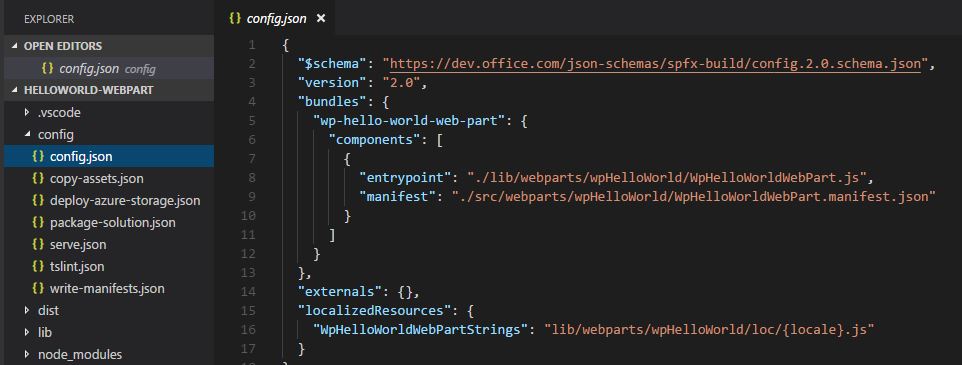
- config.json – config.json file present in the in config folder. This file has basic configuration about web part like entry point URLs, external js etc. We also create multicomponent bundles in this file.
References:
