This post was most recently updated on July 31st, 2024
Hello everyone, welcome to my SPFx article series this my third article on SPFx. Here we will discuss how to add resources correctly in a client-side web part.
First, we will see what kind of resources we add in a web part? Resources include images either a logo or icons, external third party CSS and JS, custom CSS and JS.
There are two ways to add external libraries in SPFx
- Load the library from an NPM package
- Load a script from a Content Delivery Network (CDN)
Load the library from an NPM package
We know developer toolchain uses Webpack, SystemJS, and CommonJS to bundle web parts. This includes loading any external dependencies such as jQuery or jQueryUI. To load external dependencies, we need to install from NPM at time of project creation.
Installing jQuery or jquery UI from NPM packages
|
1 2 |
npm install --save @types/jquery@2 npm install --save @types/jqueryui |
By default, any dependency you installed through NPM package is added in externals{ } section under config\config.json.
|
1 2 3 4 5 6 7 8 9 10 11 12 13 14 15 16 17 18 19 20 21 |
{ "$schema": "https://dev.office.com/json-schemas/spfx-build/config.2.0.schema.json", "version": "2.0", "bundles": { "wp-hello-world-web-part": { "components": [ { "entrypoint": "./lib/webparts/wpHelloWorld/WpHelloWorldWebPart.js", "manifest": "./src/webparts/wpHelloWorld/WpHelloWorldWebPart.manifest.json" } ] } }, <strong> "externals": { "jquery":"node_modules/jquery/dist/jquery.min.js", "jqueryui":"node_modules/jqueryui/jquery-ui.min.js" },</strong> "localizedResources": { "WpHelloWorldWebPartStrings": "lib/webparts/wpHelloWorld/loc/{locale}.js" } } |
In this scenario, all references are added by default in .ts main files.
Load a script from a Content Delivery Network (CDN)
In this scenario, we manually add external JS files from the Content Delivery Network. We add references of JS in externals{ } section under config\config.json and imports these files references in .ts file.
|
1 2 3 4 5 6 7 8 9 10 11 12 13 14 15 16 17 18 19 20 21 |
{ "$schema": "https://dev.office.com/json-schemas/spfx-build/config.2.0.schema.json", "version": "2.0", "bundles": { "wp-hello-world-web-part": { "components": [ { "entrypoint": "./lib/webparts/wpHelloWorld/WpHelloWorldWebPart.js", "manifest": "./src/webparts/wpHelloWorld/WpHelloWorldWebPart.manifest.json" } ] } }, "externals": { "jquery":"https://cdnjs.cloudflare.com/ajax/libs/jquery/3.3.1/jquery.min.js", "jqueryui":"https://cdnjs.cloudflare.com/ajax/libs/jqueryui/1.12.1/jquery-ui.min.js" }, "localizedResources": { "WpHelloWorldWebPartStrings": "lib/webparts/wpHelloWorld/loc/{locale}.js" } } |
At the top of the file, where we can find other imports, add the following imports:
|
1 2 |
import 'jquery'; import 'jqueryui'; |
In the above two scenarios, we add third-party JS files from CDN but what about if we want to add custom one? Here I explain how to add custom js files externally and inline.
Add Custom JS files
Create script.js files under src/webparts/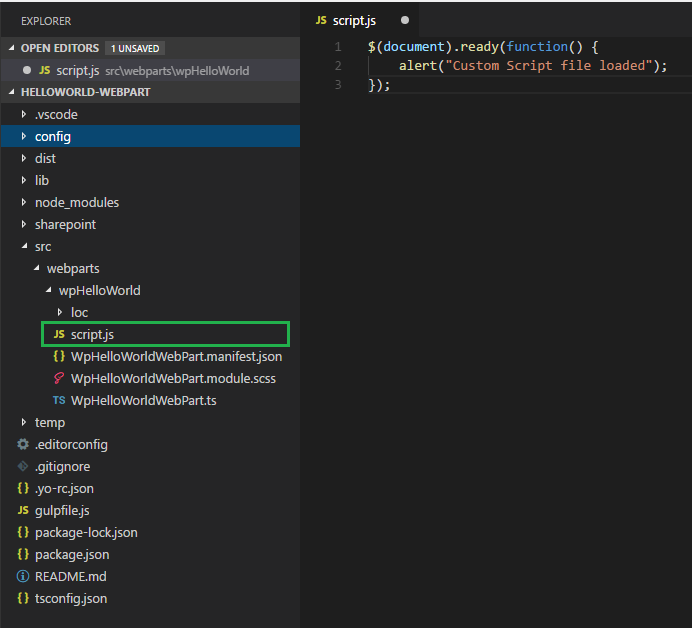
Here I add ready() function and alert() message. Now we add reference of this file into our main file .ts 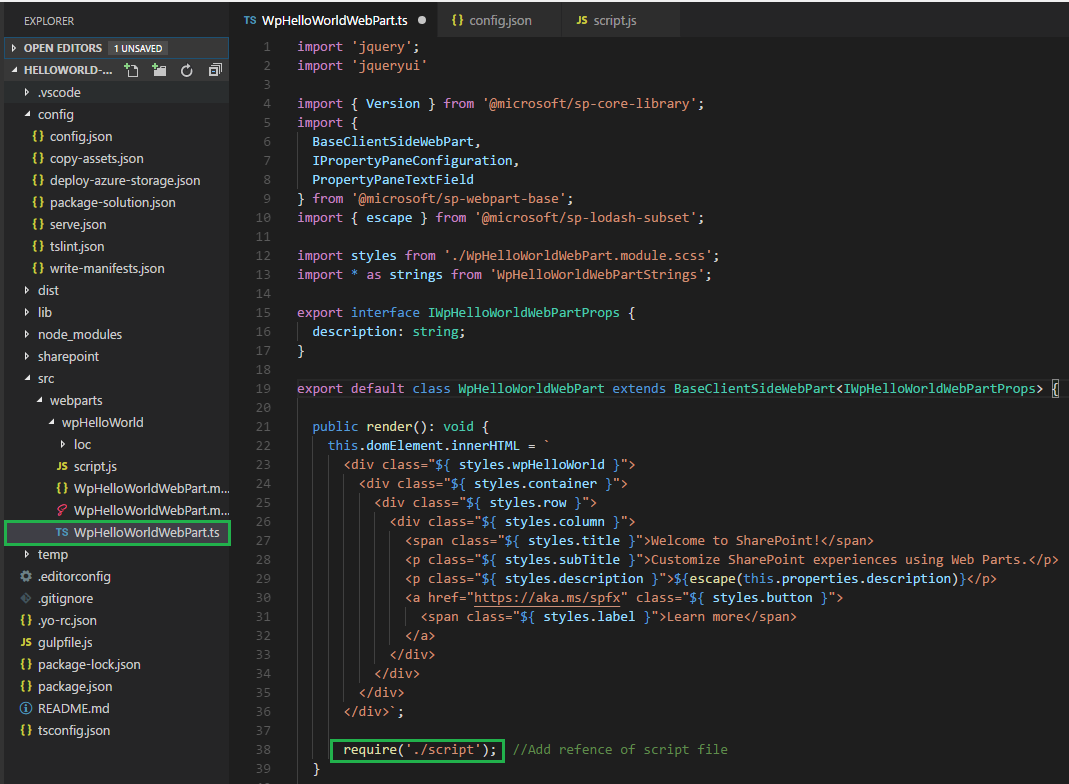
In .ts file, I add reference of a script file in render() function require(‘path: string’). At the top of the file, where we can find other imports like ‘jquery‘ which is defined under config.js file. Now see the output, alerts () message will show when we add a web part on a page.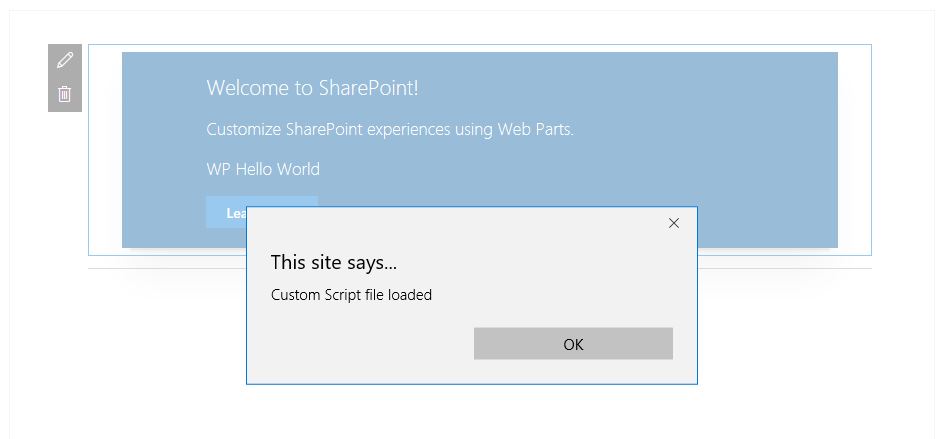
Here we also add inline js without creating an external file for that we create a variable of ‘jquery’ name ‘$’. 
Now see the output, alerts () message will show when we add a web part on a page.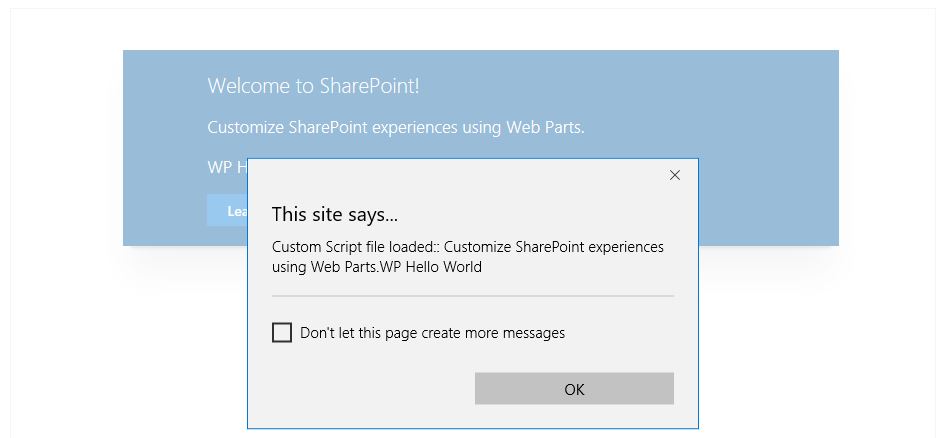
In above we cover all about JS files now we move on to CSS files.
Note: TypeScript is just a superset of JavaScript. All the TypeScript code is still converted to JavaScript code when you compile.
Add CSS into SPFx web part
We add CSS into SPFx solution using four ways are they
- SPComponentLoader module
- require() function
- Sassy CSS .scss
- inline CSS
SPComponentLoader
The common method of loading external libraries in SPFx solutions is to include a library path in the config/config.json file, in particular by including the module in the “externals” section. What if we want to add library conditional based?
SPComponentLoader responsible for loads a CSS and JS files.
Load external CSS files by using the module loader. Add the following import at the top of the .ts file:
|
1 |
import { SPComponentLoader } from '@microsoft/sp-loader'; |
Load the jQueryUI styles in a web part class by adding a constructor and using the newly imported SPComponentLoader. Add the following constructor to our web part:
|
1 2 3 4 5 |
public constructor() { super(); //Add external CSS file from CDN SPComponentLoader.loadCss('https://code.jquery.com/ui/1.12.1/themes/base/jquery-ui.min.css'); } |
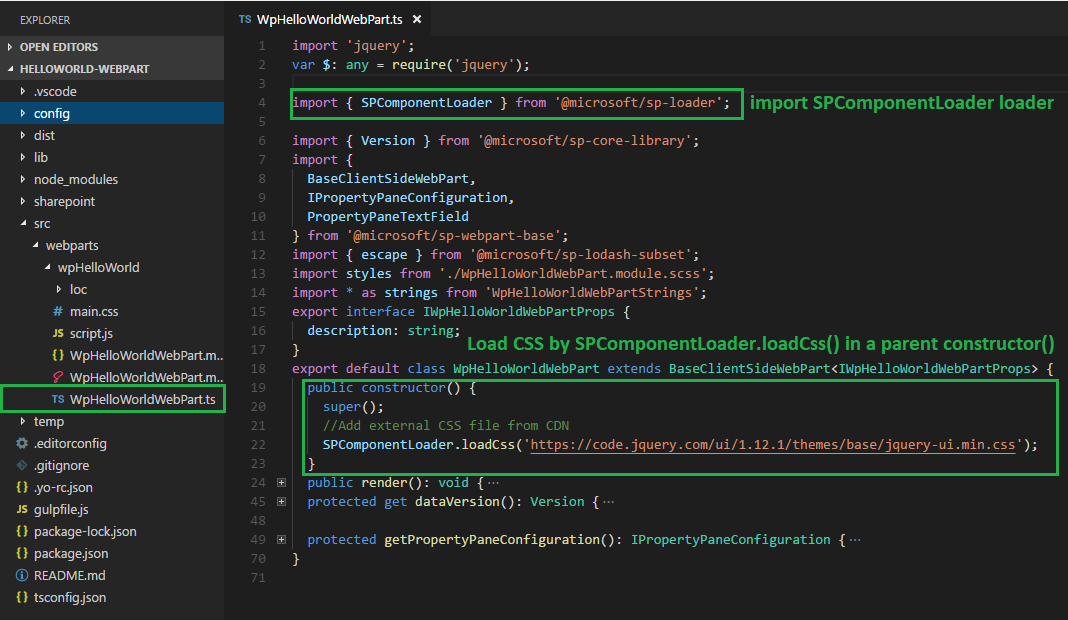
When web part initialize it calls a parent constructor() and then load CSS file.
require()
Using require() we also add custom CSS file just like a JS file which I explain already.
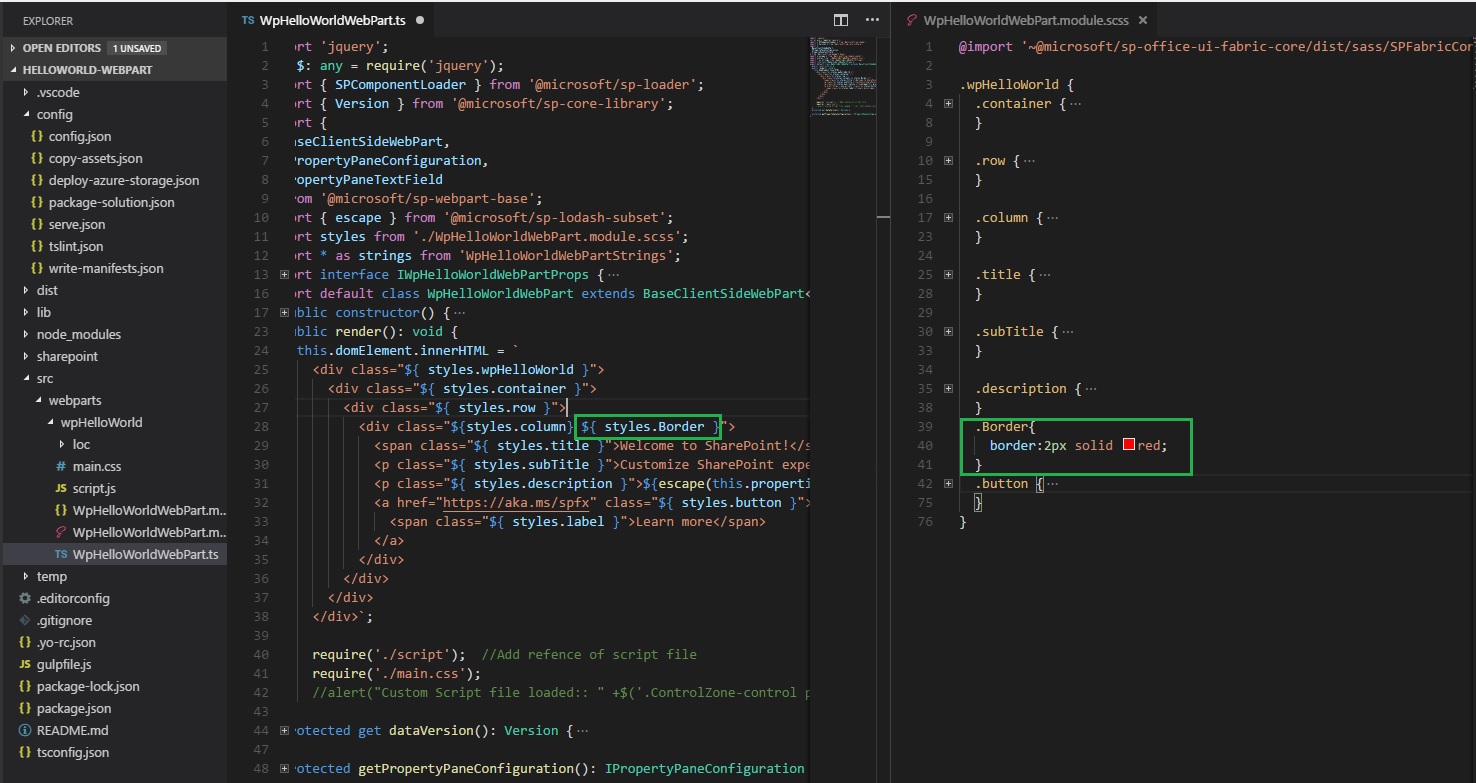
As you see an above screenshot here I create Border class in a module.scss file and reference of that class in .ts file using ${styles.Border}

inline CSS
Inline CSS mean we directly add CSS in <style> tag on .ts file. In this case, we don’t need to extra care of .SCSS file.
Add an Image in web part solution
To add custom images in SPFx solution, create a folder under src/webpart with name assetsand add images into it.
Now add the following import at the top of the .ts file:
|
1 |
const logo: any = require('./assets/bubble.png'); |
Once we create a variable of the image now we use this variable ‘logo’ in <img> src attribute : src=”${logo}”

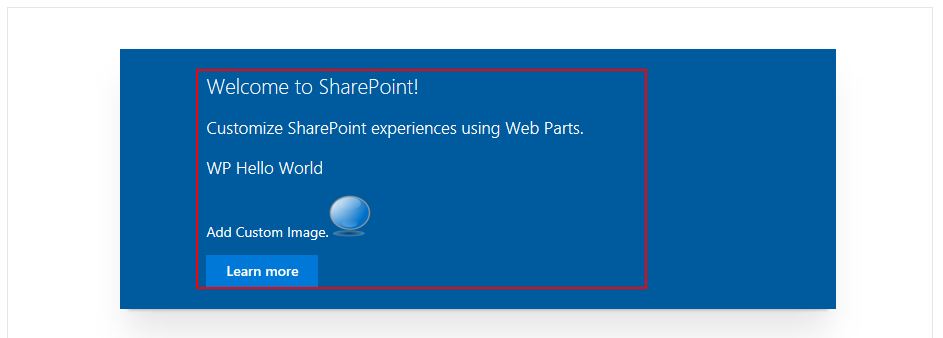
Reference:
