Setting up a new TestNG project
In the previous topic, we have discussed the installation of TestNG in the Eclipse.
Let’s create a TestNG project in the eclipse and Name it as “TestNGProject”.
Step 1. Click on File > New > Java project.

Step 2. Type “TestNGProject” as the Project Name then click Next.


Step 3. We will now start to import the TestNG Libraries onto our project. Click on the “Libraries” tab, and then “Add Library“.

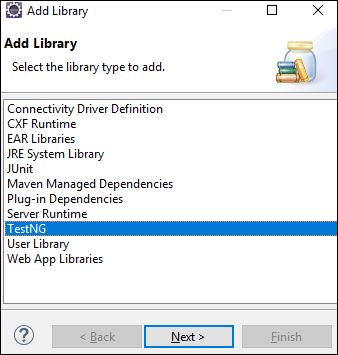
Step 4. On the Add Library dialog, choose “TestNG” and click Next.

Step 5. Click on finish.

Now we will verify if TestNG library added.

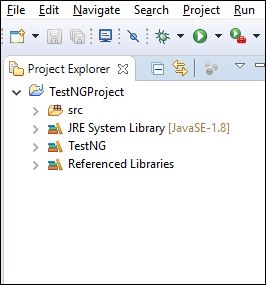
Then we will verify if Project created.
Note: Don’t forget to add the latest selenium webdriver library in the project,
You can download the Webdriver from here Selenium webdriver

As we can see our TestNG project is successfully created.
In the next topic, we will start with Annotations in TestNG.
