This post was most recently updated on June 14th, 2019
Steps to install selenium WebDriver for windows.
Step 1) Install java on windows machine (JDK)
First verify whether java is already installed on your machine or not go to command prompt and type command “java -version” and press enter.
if java is already installed on your machine then system will give you output like this
java version “1.8.0_73”
Java(TM) SE Runtime Environment (build 1.8.0_73-b02)
Java HotSpot(TM) 64-Bit Server VM (build 25.73-b02, mixed mode) ….
If java is not installed then system will give you output like this.
‘java’ is not recognized as an internal or external command,
operable program or batch file.
If you get above message then click Install JAVA/JDK here
After navigating to above site click on JDK download link as mentioned below.
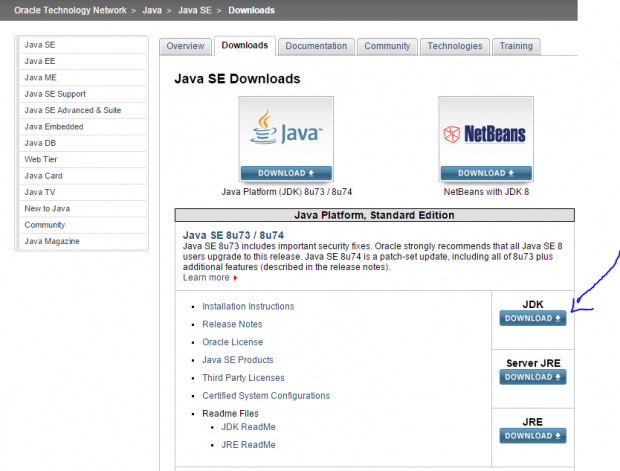
Then click on Radio Button “Accept License Agreement”

If your operating system is 32 bit then click on exe file for “Windows x86” , download it and Run.
if your operating system is 64 bit then click on exe file for “Windows x64” , download it and Run.
Step 2) Download ECLIPSE IDE from here.
Note : Please select appropriate version like 32 or 64 bit which support your windows.

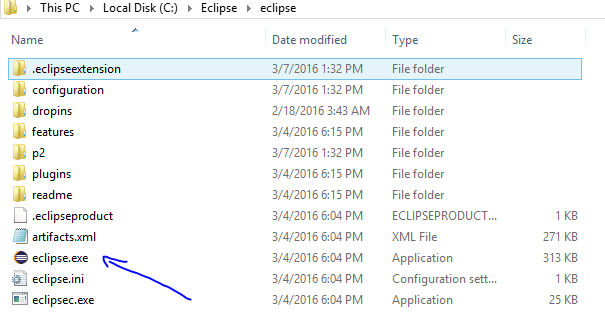
Now extract the downloaded zip file to C or D drive or wherever you want.
Step 3) Download selenium java client driver from here
Here we are creating the test scripts in java hence we require language specific drivers.
select download link for java as mentioned below

Now extract the downloaded zip file on C or D drive or wherever you want.
For maintenance purpose it is preferable if you placed all your installable or unzip file at one drive.
Step 4) Install Internet Explorer Driver Server from here
If application is running on internet explore then we need internet explorer driver.
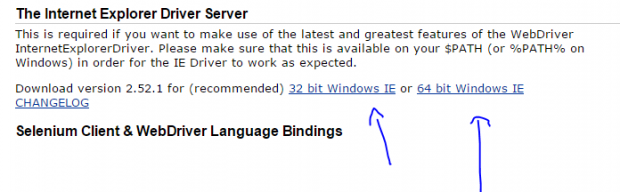
Extract the downloaded zip file to C or D driver or wherever you want.
Step 5) Configure IDE (Eclipse) with Web Driver
Open the Extracted folder of Eclipse folder (Check Step 2) , Now launch Eclipse.exe
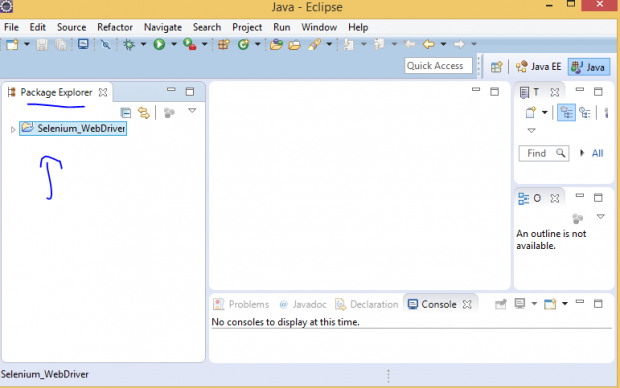
After launching eclipse.exe system will show pop up asking about selecting work space , keep default or select the folder where you want store all your projects. Click on Ok Button
You will receive below screen now Right Click on project and select “Properties” available under project explorer window shown below.
After clicking on properties system will display project property window as shown below

Click on Java Build path -> Select Tab “Libraries” … Then Click on Add External JARs
And open extracted folder of selenium java drivers (Refer step 3) …
Now select all JAR file inside and out side lib folder.
click on Apply and Ok…
Now you are ready to use Eclipse to automate application running on Internet Explorer using selenium WebDriver.
Selenium Webdriver Tutorial >>