Hello everyone, welcome to my yet another PowerApps Blog series. In the previous blog, we explore basic on Microsoft PowerApps with one of design template called ‘Start from blank’ now in this blog we explore PowerApps integration with SharePoint with design template called ‘Start from data’. In this blog, we see terminologies like Connection, Screens, Forms, and Gallary.
‘Start from data’ template automatically create canvas app based on Sharepoint list. This template generates three screen app from among 200+ data sources available but here we will use SharePoint list as a data source.
- Browse screen – Startup screen for scroll through all list items
- Details screen – Show all information of individual list item
- Edit screen – Create an item or update item information of existing item
We can create three screen canvas app in two ways:
- Generate an app from within PowerApps
- Generate an app from within SharePoint Online
We create an app using any SharePoint list but here, I create AppData list in test SharePoint environment with two columns Title and City with some sample records. Both columns are single line text type. We can create a more complex list with multiline text, date, numbers, currency or lookup columns.
As of now, PowerApps doesn’t support all types of SharePoint data. For more information, see Known issues.
Generate an app from within PowerApps
- Sign in PowerApps through your login ID on a browser you will get PowerApps startup page.
- Under Make apps like these, hover over Start from data, and click or tap Make this app.

- You will redirect on a page, here we see data template and app template. Select SharePoint tile Phone layout.

- Under Connect to a SharePoint site, type or paste the URL for your SharePoint Online site, and then select Go.

Note: Type only the site URL (not the name of the list)
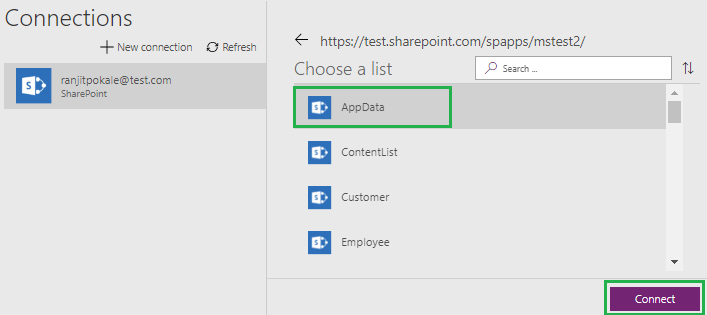
- Under Choose a list, select AppData, and then select Connect.
- Once you connect with SharePoint it takes some time to build an app and gathering SharePoint list data. After a few minute PowerApps create app with three screens.
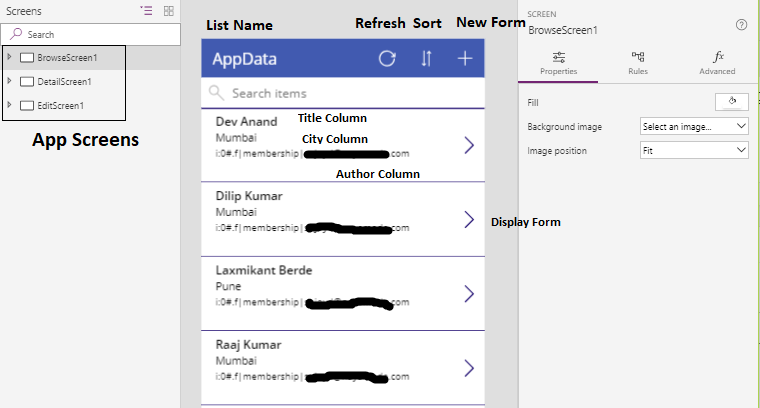
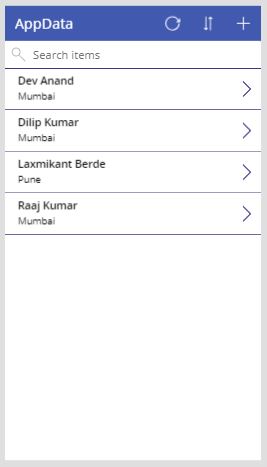
As you see in above image, left side has three screens listed, a center is browse screen preview and the right side is a control panel property.Browse screen has many functionalities at the top you will see three icons one is refresh list items icon, second is sorting lit item icon based on Title column and third is a + icon for new item form. The browse screen has a gallery which shows three columns data Title, City and Author. You’ll probably want to make more changes before you use this app or share it with others. As a best practice, save your work by pressing Ctrl-S before you proceed. Give your app a name, and then select Save.
Generate an app from SharePoint Online
In this case, we directly create an app from the respective SharePoint online list where we skip intermediate steps like Connection with SharePoint and list selection etc.
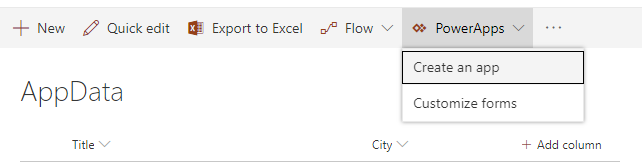
- Go to the respective SharePoint list, select PowerApps from command bar and then select Create an app
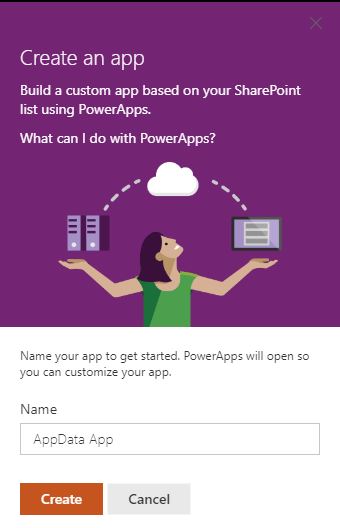
- Provide Name for an app from a panel which appears in the right side and then click on Create
- A new tab appears in your web browser that shows the app that you automatically generated based on your SharePoint list. The app appears in PowerApps Studio, where you can customize it. In this case, as you noticed PowerApps studio do the same job as it does in ‘Generate an app from within PowerApps’. A browse screen will appear the same as in a previous way.
PowerApps Customization
As of now, we see how to create an app, now we see how to customize the app. Generally an app may contain two basic elements Gallery and Forms.
Gallery: A layout container that holds a set of controls which represents records from a data source. When you expand BrowseScreen1 you see BrowseGallery1 which represents records of AppData list as a data source and layout is ‘Title, subtitle and body’. Now we change the layout to ‘Title and Subtitle’. From left side, screens pane expand BrowseScreen1, select BrowseGallery1. Select Layout to open a layout.
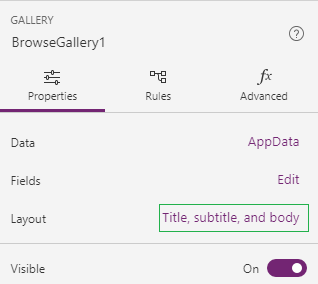
In data pane, you will see date source, layout, and listed column. In the listed options, select the option that shows only a title and subtitle.

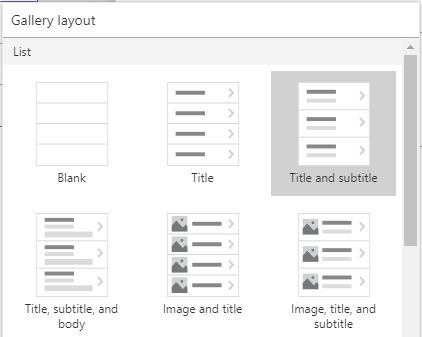
Once you change gallery layout, it immediate reflect and changes will happen. See BrowseScreen1.
Forms: Canvas app has two type of forms display and edit. In forms customization, we see how to changes column orders and show/hide columns. Expand DetailScreen1 and select DetailForm1.

From Data pane you may check unchecked columns whichever you want, you may also re-order columns by dragging up/down.