This post was most recently updated on June 26th, 2019
What is TestNG FrameWork?
1. TestNG is the most widely used testing framework in the software testing industry. It is an open source automated Testing framework.
2. TestNG is an automation testing framework in which NG stands for “Next Generation”.
3. TestNG is used for different kinds of testing like unit, functional, integration testing, end-to-end and etc.
4. TestNG is inspired by JUnit which uses the annotations (@).
5. TestNG allows you to group the test cases easily which is helpful if you want to run specific test cases.
Example, Let’s consider a scenario where we have created two groups such as ‘Smoke’ and ‘Regression’. If you want to execute the test cases in a ‘Regression’ group, then this can only be possible in the TestNG framework.
6. TestNG provides more powerful and flexible test cases with help of easy annotations, grouping, sequencing and parametrizing.
7. TestNG produces HTML reports for implementation.
8. TestNG can generate a proper report, and you can easily get the exact report of many test cases are passed, failed and skipped.
9. TestNG allows you to execute test cases parallelly i.e multiple test cases can be run in the TestNG framework.

How To Install TestNG FrameWork in the Eclipse
There are 2 ways to install the TestNG frameWork
1. Eclipse Marketplace.
2. Install new Software.
Method 1) Installing TestNG using “Eclipse Market Place”
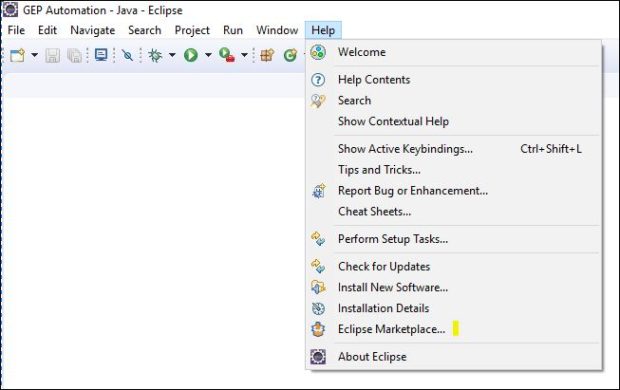
step 1. Launch the Eclipse, on the menu bar click on the Help and choose the “Eclipse Marketplace” option.
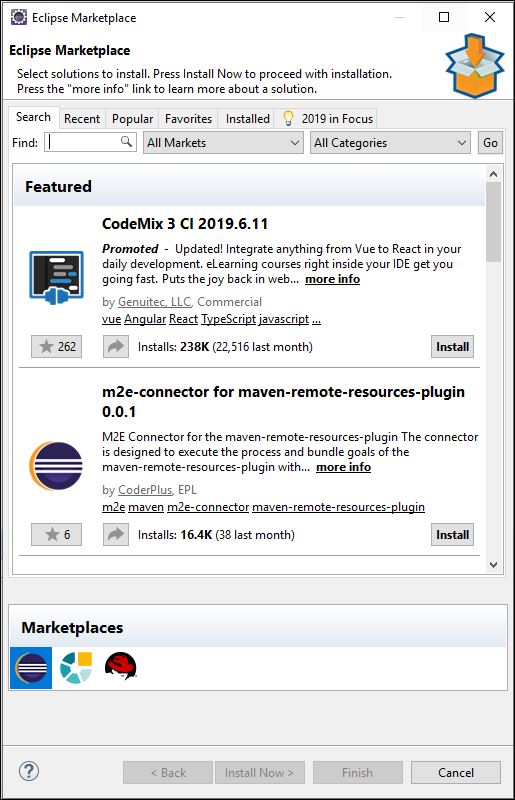
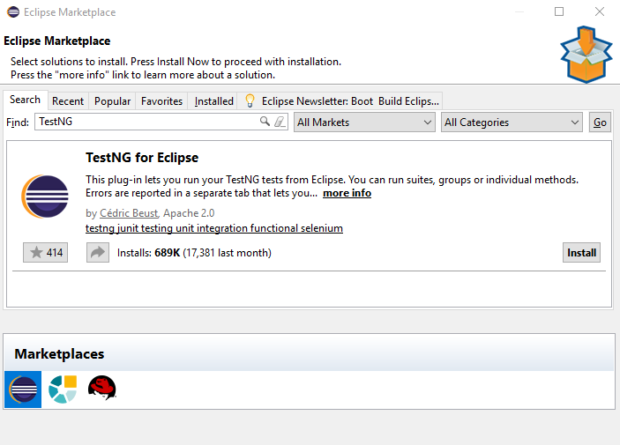
step 2. In the Eclipse Marketplace dialog box, type TestNG in the search box and press in the search button (magnifying glass) or press enter key.
step 3. Click on the Install button
step 4. A new window for feature selection will open TestNG M2E is optional, no need to change anything and click on the confirm button.

Click Next again on the succeeding dialog box until you reach the License Agreement dialog.
Click “I accept the terms of the license agreement” then click Finish.

step 6. Wait for the installation to finish.

step 7. You may or may not encounter a Security warning if in case you do just click OK.

step 8. When Eclipse prompts you for a restart, just click Yes.

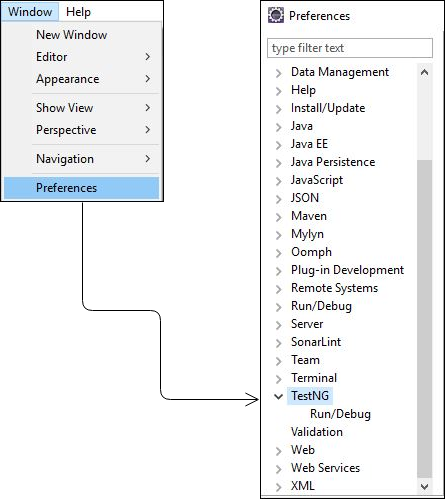
step 9. After the restart, verify if TestNG was successfully installed. Click Window > Preferences and see if TestNG is included on the Preferences list.
Method 2) We will install TestNG using “Install New Software”
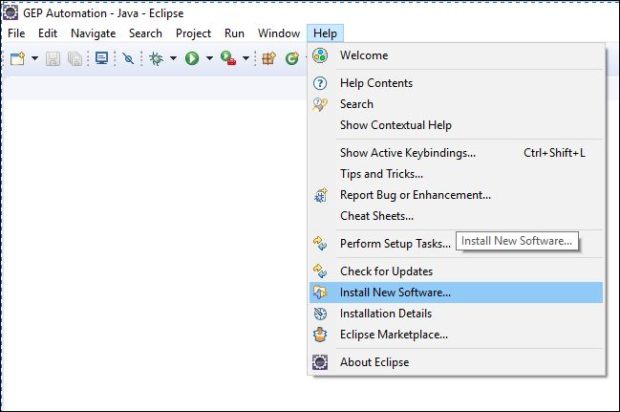
step 1. Launch the Eclipse IDE and from the Help menu, click on the “Install New Software“.
step 2. You will see a dialog window, click on the “Add” button.

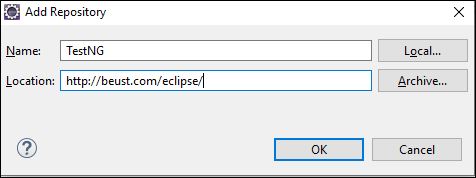
step 3. Type name as “TestNG” and enter location as “http://beust.com/eclipse/“ and click on the OK button
step 4. Now TestNG option should be visible and click on the next button.

step 5. After installation without changing anything click on the next button.
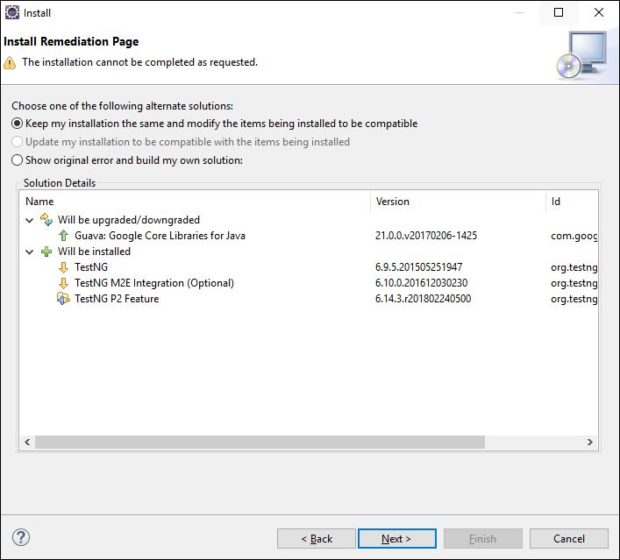
step 6. Now you will see install details, so just click on the next button.

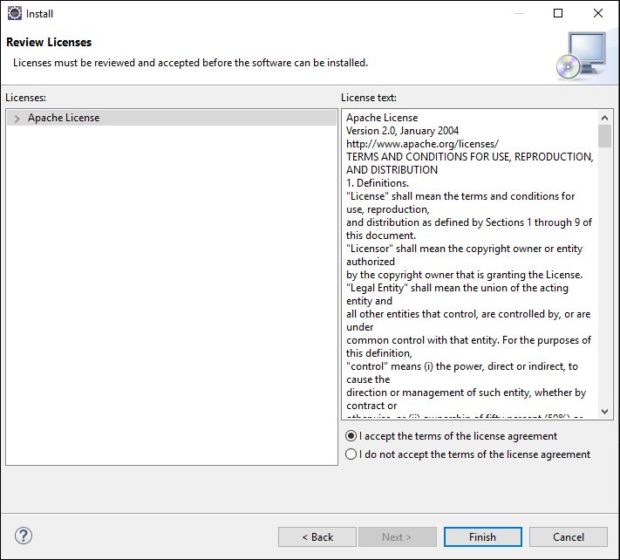
step 7. Now you will see “Review License” window and accept the license agreement, click on the finish button.
step 8. You may or may not encounter a Security warning if in case you do just click OK.

step 9. Now you will need to restart Eclipse to complete the installation properly. So just click on the Yes button.

step 10. After the restart, verify if TestNG was successfully installed. Click Window > Preferences and see if TestNG is included on the Preferences list.

Here, We have successfully installed the TestNG frameWork in the Eclipse.
In the next topic, we will discuss How to create TestNG project in Eclipse.
