This post was most recently updated on July 30th, 2024
Hello everyone, in this post we will discuss about Add-in App Part, what is an app part and how to create and show SharePoint Hosted Add-ins as an App-Part.
What is an App Part
App Part is basically Client Web Part to present an add-in content to an end user. An App Part uses an Iframe html element inside a SharePoint page to display the contents of an app. In App Parts, the UI and the app content is generated remotely with the app code running outside of the SharePoint server.
Steps to build an app part
- Create an add-in name Accordion in Microsoft Visual Studio 2013. For more info to create accordion read post How to Create a Basic Accordion SharePoint Hosted Add-in
- So we assume that you have setup Basic Accordion add-in, now we will add a Client Web Part item to the Accordion solution. Client Web Part is also called ‘App Part’, where it provide a structure to placed add-in in Iframe html element inside a SharePoint page.
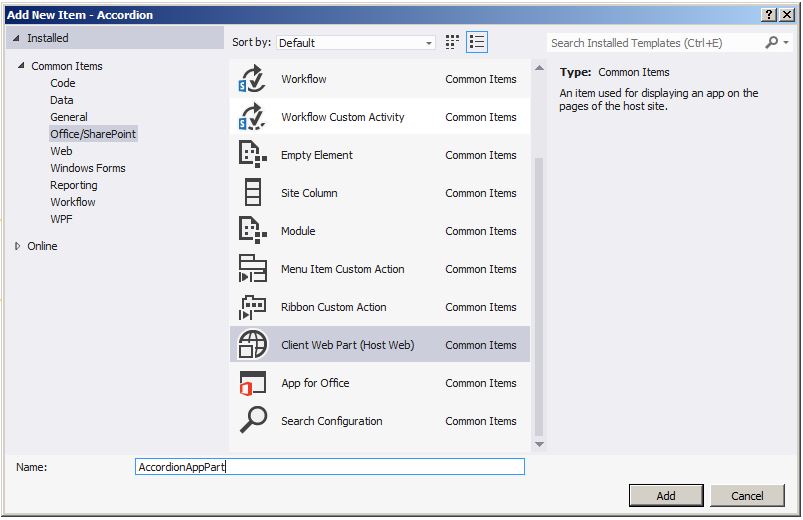
Go to Accordion Add-in Solution Explorer and Right Click on Add Solution , Navigate to Add option and then Click On New Item.

From item template select Client Web Part ( Host Web ) give it name AccordionAppPart
- On Add button click “Create Client Web Part” wizard will appear. Here we want to set page for a App part, either checked 1st radio button option “Create a new client web part page” by mentioning page name “AccordionAppPartPage” or 2nd option “Select or enter a URL from an existing web page”. For more convenience we go with 1st option.
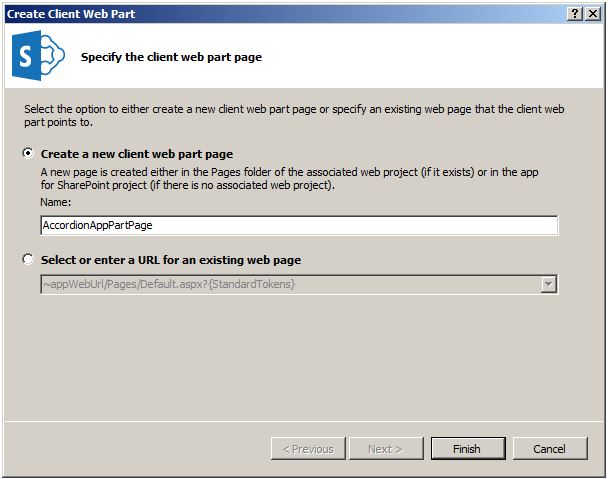
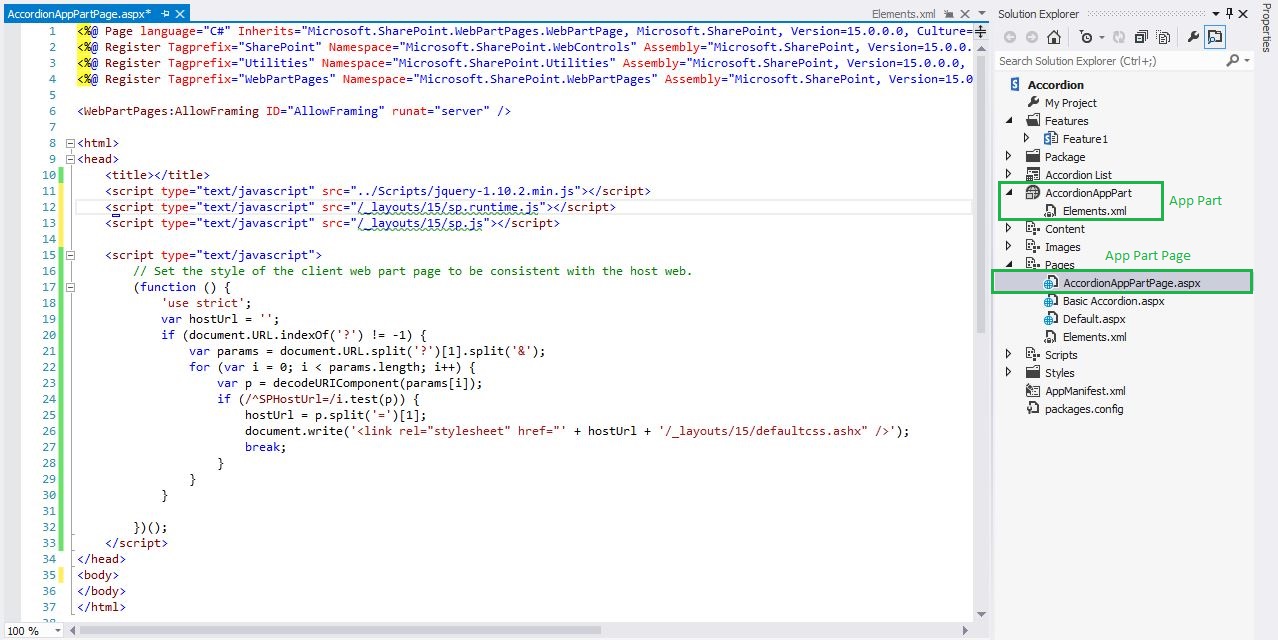
This will creates a Client Web Part module and a page in pages directory in our solution.
- App Part Properties
We can change the properties of an App Part, like the title, description, height, width and also add dynamic custom property by modifying the Elements.xml. Element.xml file have three elements which are <ClientWebPart> parent and <Content> ,<Properties> have child.
- <ClientWebPart> : Use for configuring a client web part properties like Name, Title, Description, Width and Height.
- <Content> : Content element identifies the location of the page inside that will render inside an client web part. Also we passed query string using pattern _propertyName_. For more info about query string read article “App Part Properties”
- <Properties> : In Properties element we define properties. For more info about dynamic app properties read article “App Part Properties”

- Client web part page: When you open the AccordionAppPartPage.aspx page you will notice that it looks different as compared to the Default.aspx. Where the Default.aspx is configured with the SharePoint master page and the App Part Page is an empty page with no master page. This is because the App Part Page will be shown in an IFrame, so we need an empty page. In an App Part Page we only add JavaScript and CSS references.
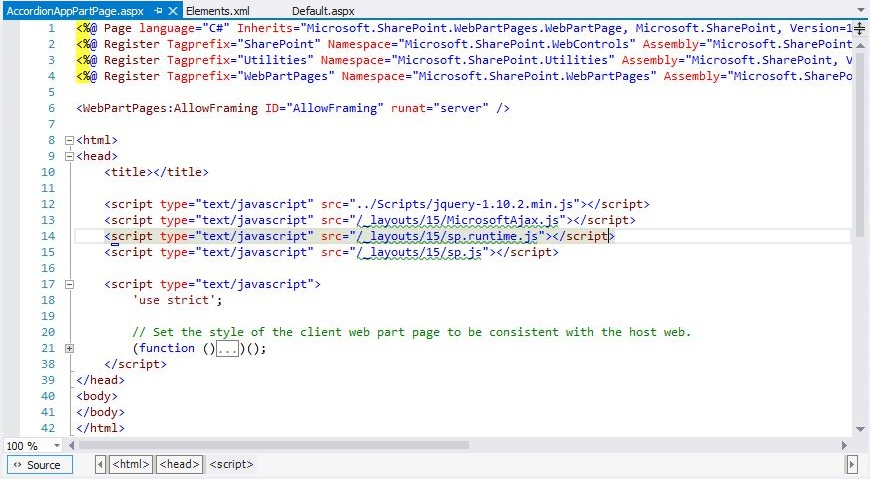
Now let’s create the simple Accordion on this page. Therefor we need to add following script and css reference in the header.
Also add html content in body tag that makes accordion.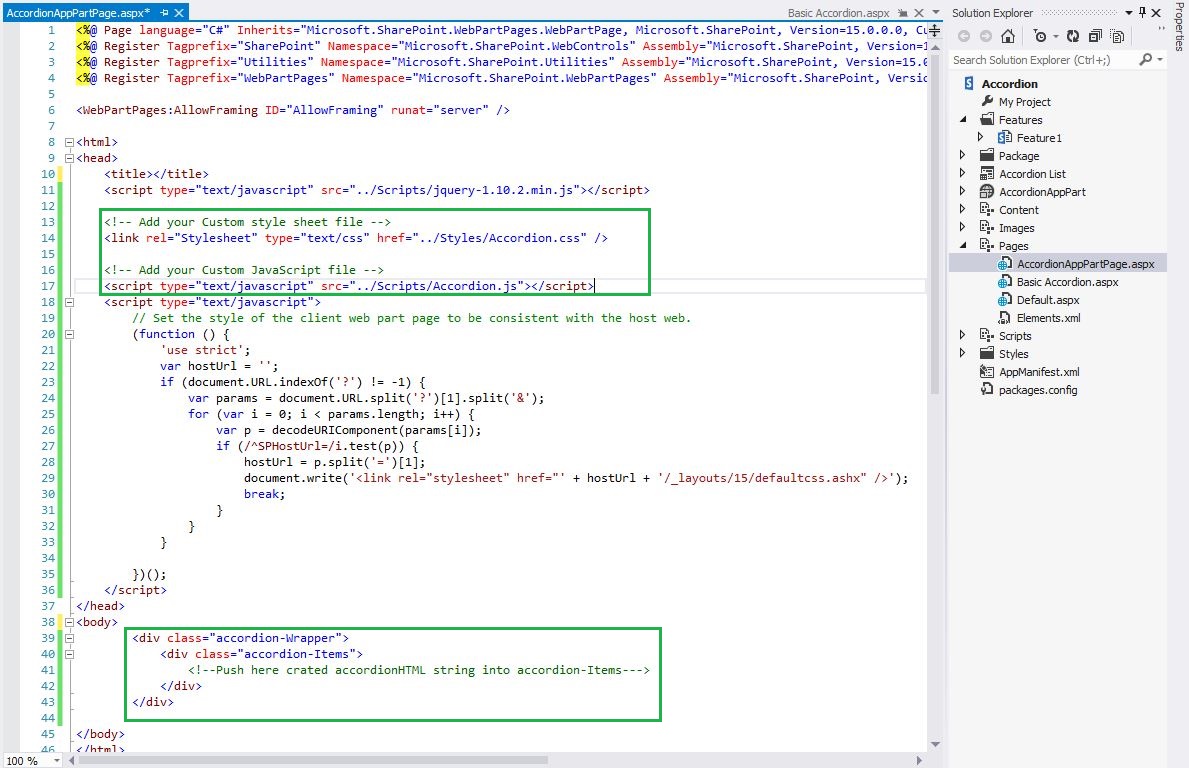
- Run and Deploy the Add-In solution, Now go to the developer site and add the Web Part page with any name.

- On edit web part page you see Add a Web Part, when you click on add a web part, list of web part are shown in page ribbon among them one of the own created app part you see.
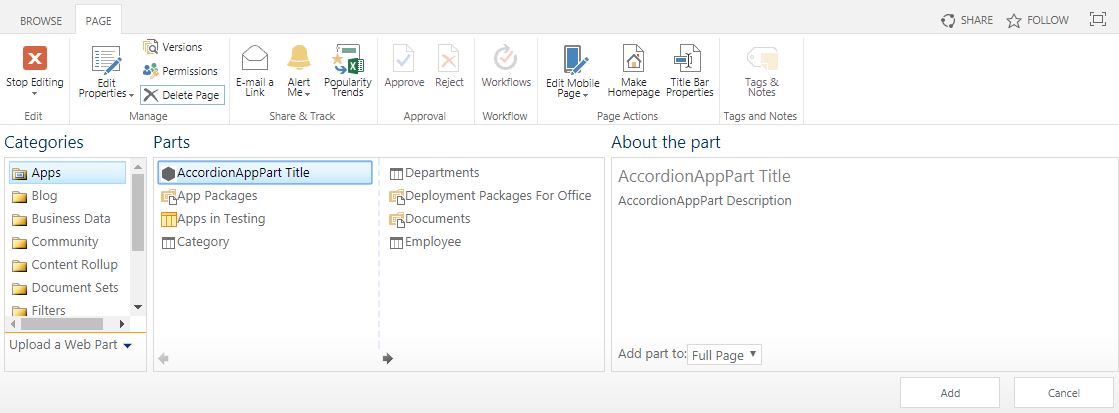
- Initially the Client Web Part will be rendered with the default values on page which basic accordion.

Read my further article on SharePoint Hosted App Parts
- Run and Deploy the Add-In solution, Now go to the developer site and add the Web Part page with any name.
