This guide was created to provide a simple, step-by-step way for beginners to quickly learn how to send an email using workflow when an item is created or changed in SharePoint.
Workflow is another great feature of SharePoint. Workflow triggers automatically once you setup workflow according your start options.
There are two SharePoint workflow platform in SharePoint.
1. The SharePoint 2010 workflow platform.
2. The SharePoint 2013 workflow platform.
So in this explanation we are using SharePoint 2013 workflow. You can also create a workflow from SharePoint OOB form document/list setting.
We always prefer to create workflow using SharePoint Designer Tool because there are custom action available to create business rule.
Please follow steps below in order to send an email using workflow.
1. Open your site in SharePoint Designer.
2. Navigate to “Workflows”.
3. Click “List Workflow” on ribbon and select your list where you want to create workflow.

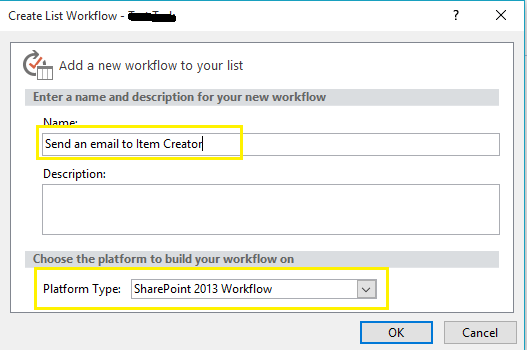
4. Add your Workflow name and select Platform Type. Description is optional.
5. Select “Send an email” form Action tab.

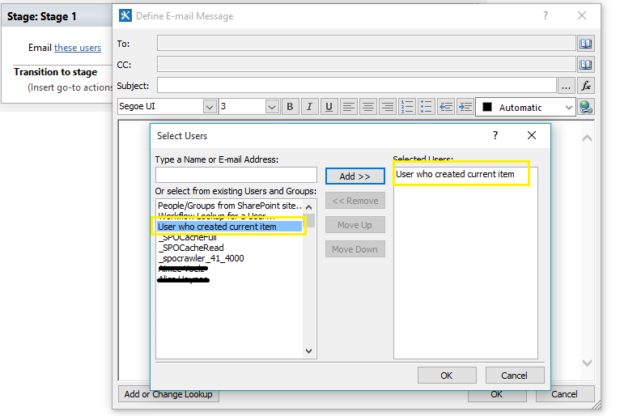
6. Configure “Send email” action. Add receptionist email ( You can add SharePoint Groups,Members and personal email id). Also define subject, body text etc.
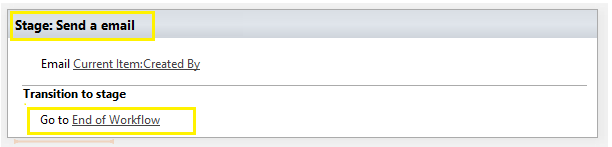
7. Below is configured workflow. You can rename the stage name. You have to end your workflow under “Transition Stage”. You can continue if you want to add any other condition but in the end you have to “End of Workflow”.
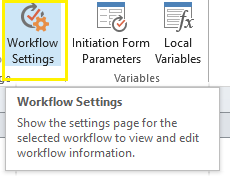
8. Now go to “Workflow Setting” under SharePoint ribbon.
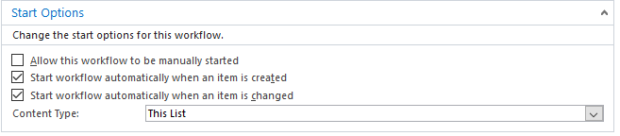
9. Choose SharePoint Workflow option under “Start Options” section, below workflow run when item is created or changed.
10. Save and Publish workflow.

Test workflow yourself with below step.
1. Open your list and add an item
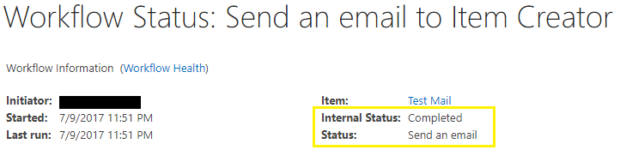
2. You will see another column in the list which is the ( Send an email to Item Creator ) name of workflow.

3. Click on stage name “Send an email” to see workflow status.
We hope this article helped you learn how to send an email using SharePoint workflow and utilize all the features available to you.
If you liked this article, then please share and comment.