This post was most recently updated on July 31st, 2024
In my previous post, “How to Create a Basic Accordion SharePoint Hosted Add-in,” we focused on the basic Accordion App. In this article we will learn How to Create a Custom List, List Column, List View and List Instance.
To perform all action we need to create a custom list in SharePoint Hosted App.
Table of Contents
- Go to Create A Custom List
- Go to List Columns
- Go to List Views
- Go to List Instance
- Go to Choices Fields Values
To create a Basic Add-in please read How to create Hello World SharePoint Hosted Add-in and follow given instruction to create a basic Add-in.
Create A Custom List
- Go to HelloWorld App Solution Explorer and Right Click on App Solution, Navigate to Add option and then Click On New Item.
- Go to Office/SharePoint > List, Create a New Custom List and Click on Add.
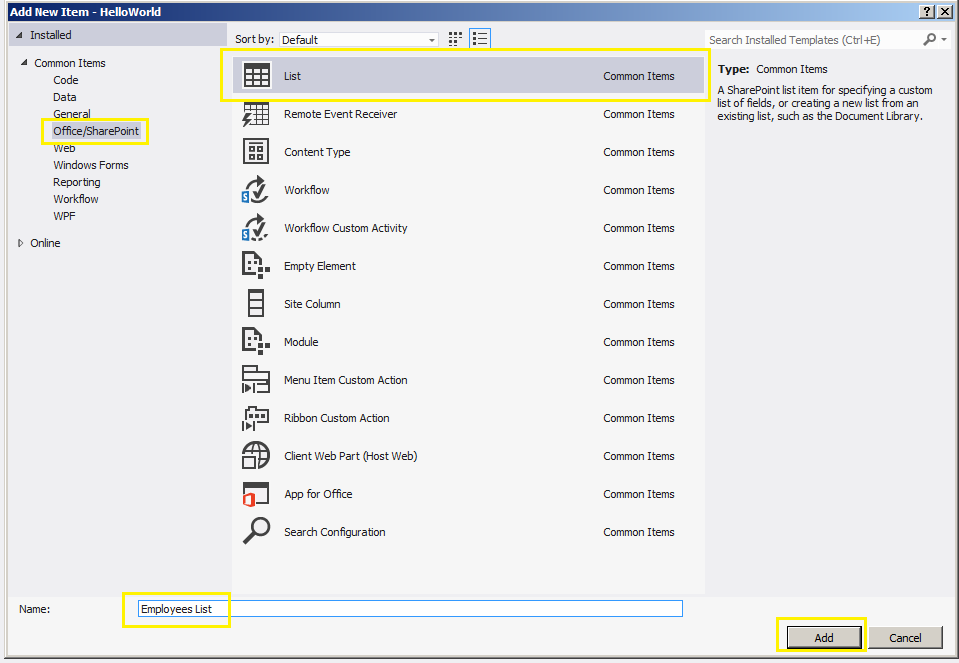
- In SharePoint List Wizard settings choose Custom List option and Click on Finish. If you want to use existing list template you can go with existing list template setting options. In this scenario I choose Custom List option.
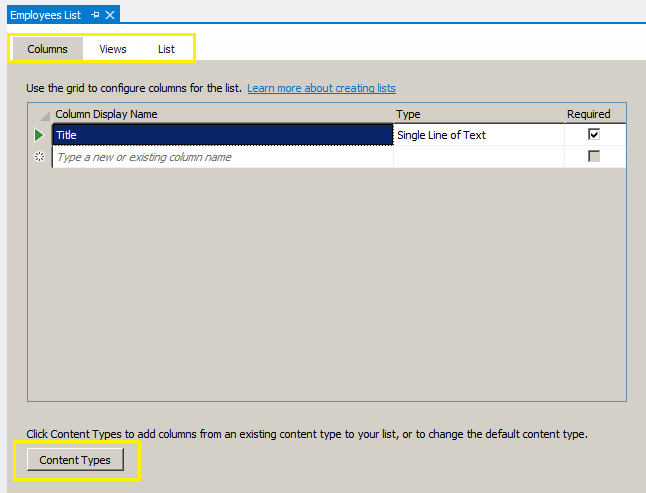
- You can See three Tab Columns, Views and List in newly created List, Under Columns Tab you can add new column, Under Views you can create list view and under List tab you can manage or change List Name, List URL, List Descriptions, Show list name in Quick launch and Hide list from browser.
Available List columns in SharePoint App:

Open List Schema.xml file and you will see FieldRef element under ContentTypes in highlighted area also you can see column and his attributes. FieldRef defines the internal data types used in the list. The following markup showing Title and My Address column field attributes.

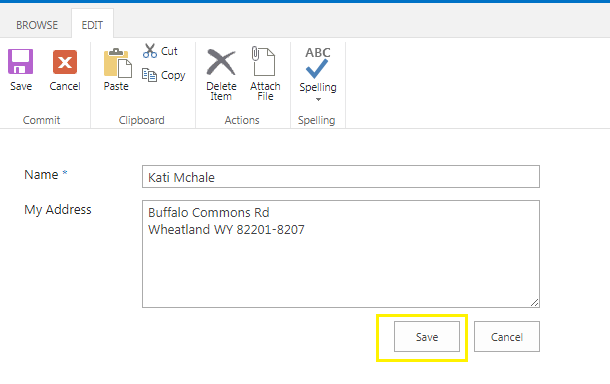
New form with Name and My Address Column.
List Columns
A SharePoint Column type decide how data stored and displayed in SharePoint list or library. There are 14 type of column available in SharePoint add-in Custom List. In this tutorial I created all available columns type.
First let understand the columns type and used in brief.
- Boolean (Yes/No) : Use this column type to set true/false Or yes/no. A Yes/No column appear in Checkbox.
- Choice : You can specify choice options for this column and you can add your own value. It shows Drop-downs, Radios Buttons and Check-boxes.
- Currency : Store Numerical values, you can change format and specify number range.
- Date and Time : Use this column to store calendars value with Date and Time format or Both.
- Lookup : Use this column to used already stored value in site.
- Multiple Lookup : Use this column to used already stored value in site. It’s allow multiple selections.
- Multiple Value Choice : It’s same like Choice but in this column you can allow multiple selections to select.
- Multiple Lines of Text : Use this column to display formatted text or long text and numbers on more than one line.
- Number : Store Numerical values only. You can specify decimal value also.
- Single Line of Text : Use this column to display one line text.
- Hyperlink or Picture : Use this column to display any type of link or URL.
- Multiple Persons or Groups : Use this column to provide searchable list of people and groups. It’s allow multiple selections to people or groups.
- Person or Group : Use this column to provide searchable list of people and groups.
- Geographic Location : Use this column to display current location and you can specify location adding latitude and longitude coordinate.
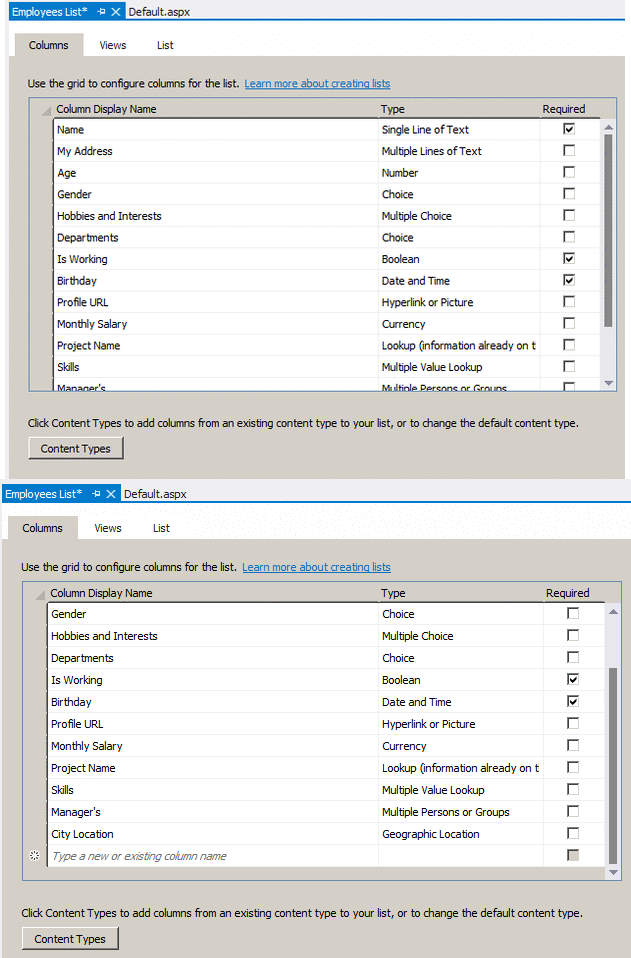
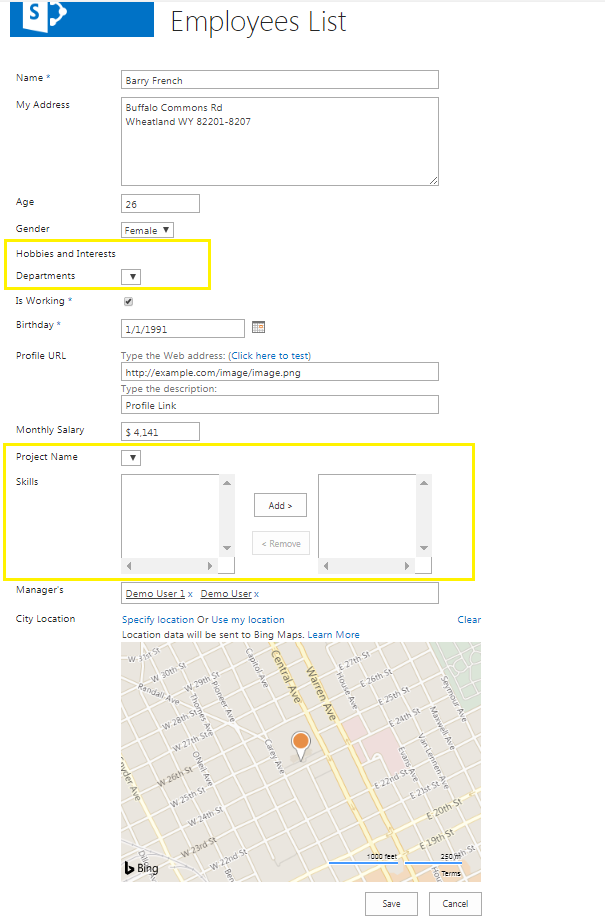
In below list I created list form with all available SharePoint List columns also you see some column values are missing, In SharePoint Out of Box we can specify choices values in respective column but in SharePoint Add-in list we have to add this choices values on respective list schema.xml file.
Employees List New form with all missing all choice and Lookup fields value.
How to add Choices Fields Values
You can add our Choices values for column type Choice and Multiple Value Choice In the Elements.xml file. You can also check below attribute combination with column. There are some other Column like DateTime, Person Or Group field and Look Up in list which accept some other attribute,are listed below.
- Type=”MultiChoice”, Type=”Choice”:- Allow to create Single and Multi-Choice column
- FillInChoice=”True” :- Allow to add our own value for Drop-down field.
- Format=”Dropdown”, Format=”RadioButtons”:- You can specify format of Choice field.
- UserSelectionMode=”PeopleOnly” :- Use for Person Or Group field
|
1 2 3 4 5 6 7 8 |
<Field Name="YourColumnActualName" ID="{GUID}" DisplayName="YourColumnDisplayName" Type="MultiChoice" Required ="TRUE" > <!--Add Your CHOICES Here--> </Field> |
Add the below child markup to the Field element. To set default value define any existing choice value in Default
|
1 2 3 4 5 6 7 |
<CHOICES> <CHOICE>Option 1</CHOICE> <CHOICE>Option 2</CHOICE> <CHOICE>Option 3</CHOICE> <CHOICE>Option 4</CHOICE> </CHOICES> <Default>Option 1</Default> |
How to add Look up and Multiple Lookup column
|
1 2 3 4 5 6 7 8 9 10 11 12 13 14 15 |
<Field Name="YourColumnActualName" ID="{GUID}" DisplayName="YourColumnDisplayName" Type="Lookup" List="Lists/Projects List" ShowField="Title" /> <Field Name="YourColumnActualName" ID="{GUID}" DisplayName="YourColumnDisplayName" Type="LookupMulti" Mult="TRUE" List="Lists/Skills List" ShowField="Title" /> |
List Instance
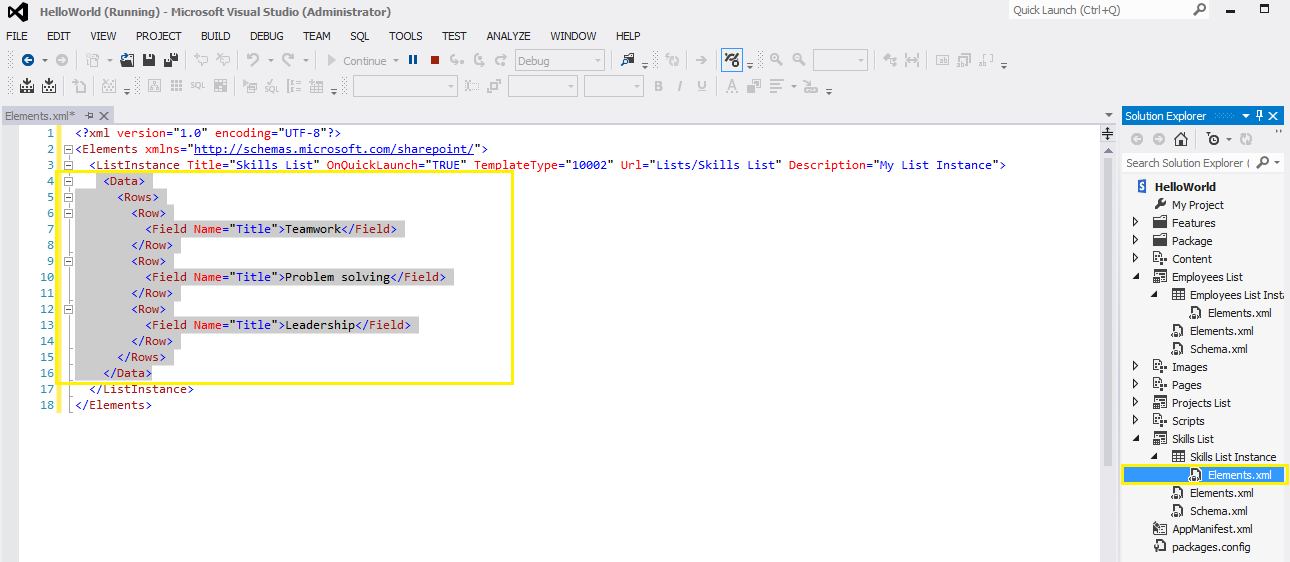
We can add our static row data or list instance for any SharePoint add-in list from List Elements.xml file, In below image I create the list instance by adding <Data> tag and <Rows> for Skills List which is Multiple Type Look up in Employees List. SharePoint list automatically manage list data when we add dynamic row in list.
List Views
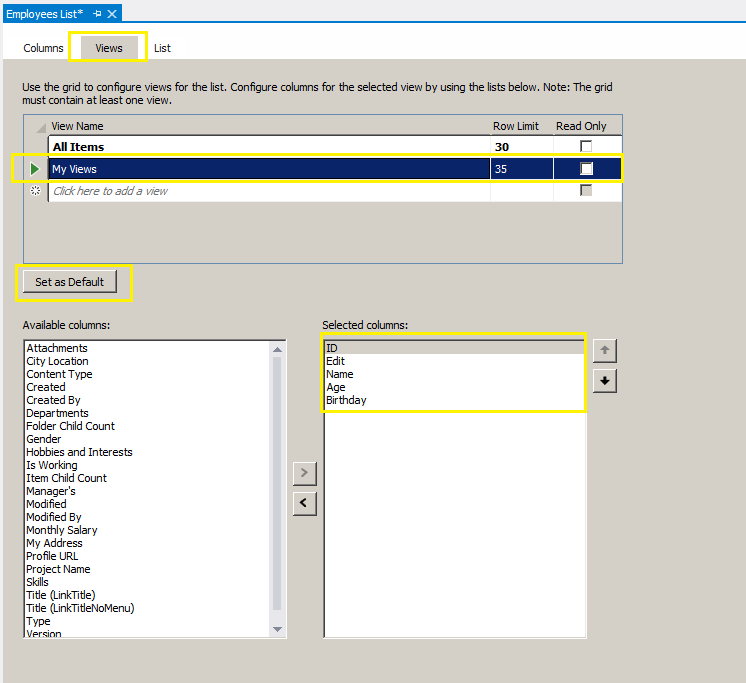
You can customize list view under Views tab and create multiple views with row limit. You can Add/Remove and Move Up/Move Down list column,with Set as Default option we can set default list view.
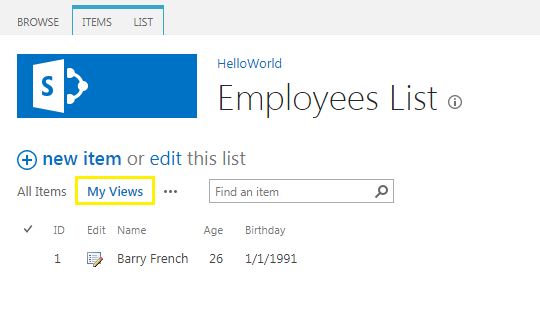
List Views Output
Further reading of this series:
How to create Hello World SharePoint Hosted Add-in
About add-in permissions in SharePoint Hosted Add-Ins
What is the Host Web URL and App Web URL in SharePoint add-in?
What is Manifest file in SharePoint Add-In?
Hope you find it helpful. If you liked this article, then please share and comment.

